Printing labels on Epson TM-T88IV
Tags:Epson TM-T88 is a series of thermal receipt printers that are very common and can be found on eBay for as little as $10, as well as elsewhere around the world. It is not designed to print on self-adhesive labels but, given that it has a cutter, can be easily and reversibly adapted to doing so.
In this note I demonstrate how to reliably print labels on a TM-T88IV.
- Tools
- Materials
- Selection of label tape
- Adjusting printer to use narrower tape
- Printing labels with ESC/POS
- Observations and conclusions
Tools
- FDM 3D printer
- (contracted out)
Materials
- Filament
- black ABS (contracted out)
- 29mm wide continuous self-adhesive thermal label tape
- Brother DK22210
Selection of label tape
The TM-T88 printer normally uses 80mm wide rolls. Unfortunately, there are almost no label tapes that are 80mm wide, and using any other size results in alignment issues. Furthermore, there do not seem to exist any continuous 80mm wide label tapes, and the hardware and software to align the print with the label gap is nontrivial.
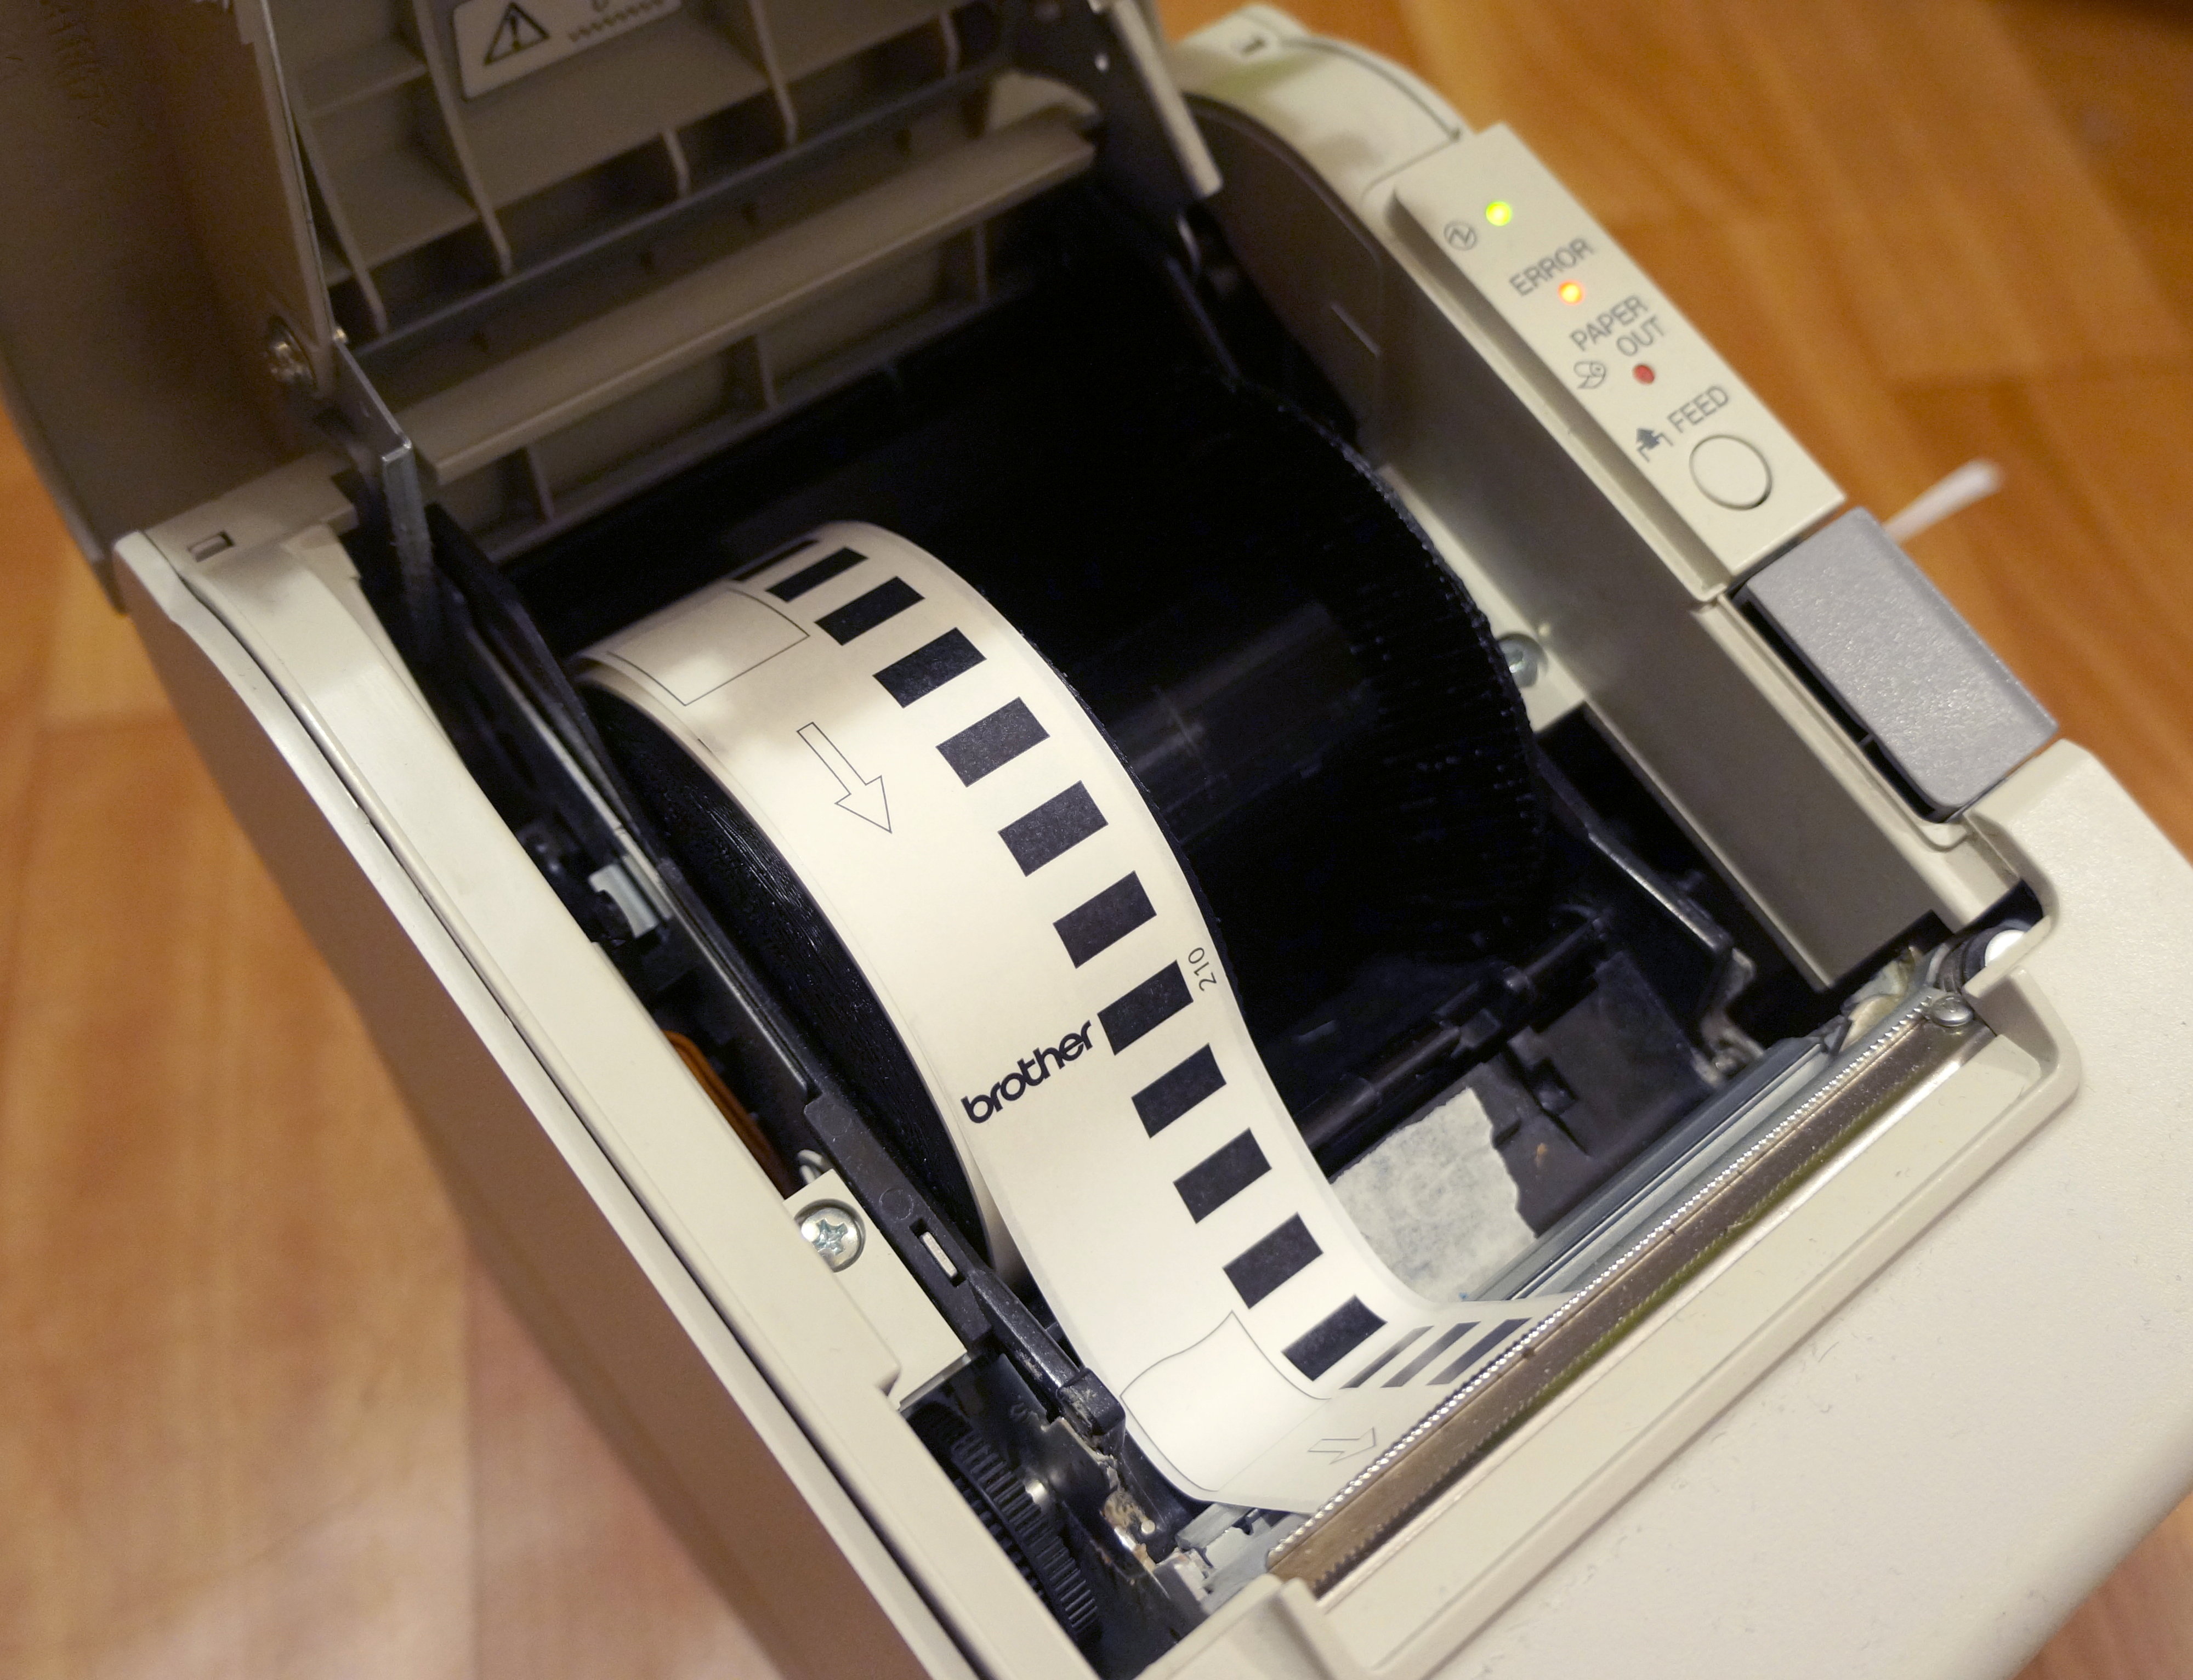
The solution is to use a continuous label tape which can be cut in any desired place. Brother makes cartridges in several sizes, most popular being 29mm and 62mm:

The plastic parts are of course incompatible with TM-T88, but they are easily broken off.
Adjusting printer to use narrower tape
To make sure the narrow tape is always aligned with the printed text, I opted to design two 3D printed parts in SolveSpace, left spacer (CAD source, STL) and right spacer (CAD source, STL), both 80mm in diameter:
(The viewer above supports zoom, panning and rotation.)
To use these parts, it’s necessary to cover the paper out sensor with some tape, since the 29mm tape aligned to the left side will not cover it itself:

The purpose of the left spacer is to bring the tape out of the partial cut zone, so that it will always be fully cut. It’s possible to move it to the right side to regain partial cut capability.
Note that the Brother paper roll is wound in the reverse direction compared to the regular receipt paper roll.
Printing labels with ESC/POS
To print labels on such narrow tape, it is most convenient to set up the printer in page mode. An example sequence of commands would be:
-
ESC @: reset -
ESC L: select page mode -
ESC T 1: select bottom to top print direction -
ESC W \x00\x00 \x00\x00 \xBA\x00 \x2c\x01: select page origin to (0,0) and dimensions to (186, 300); 186 device units correspond to 29mm since the full scale is 512 device units and 80mm -
GS \ \x10\x00: add vertical offset of 16 device units in page coordinates to bring text within bounds of the tape -
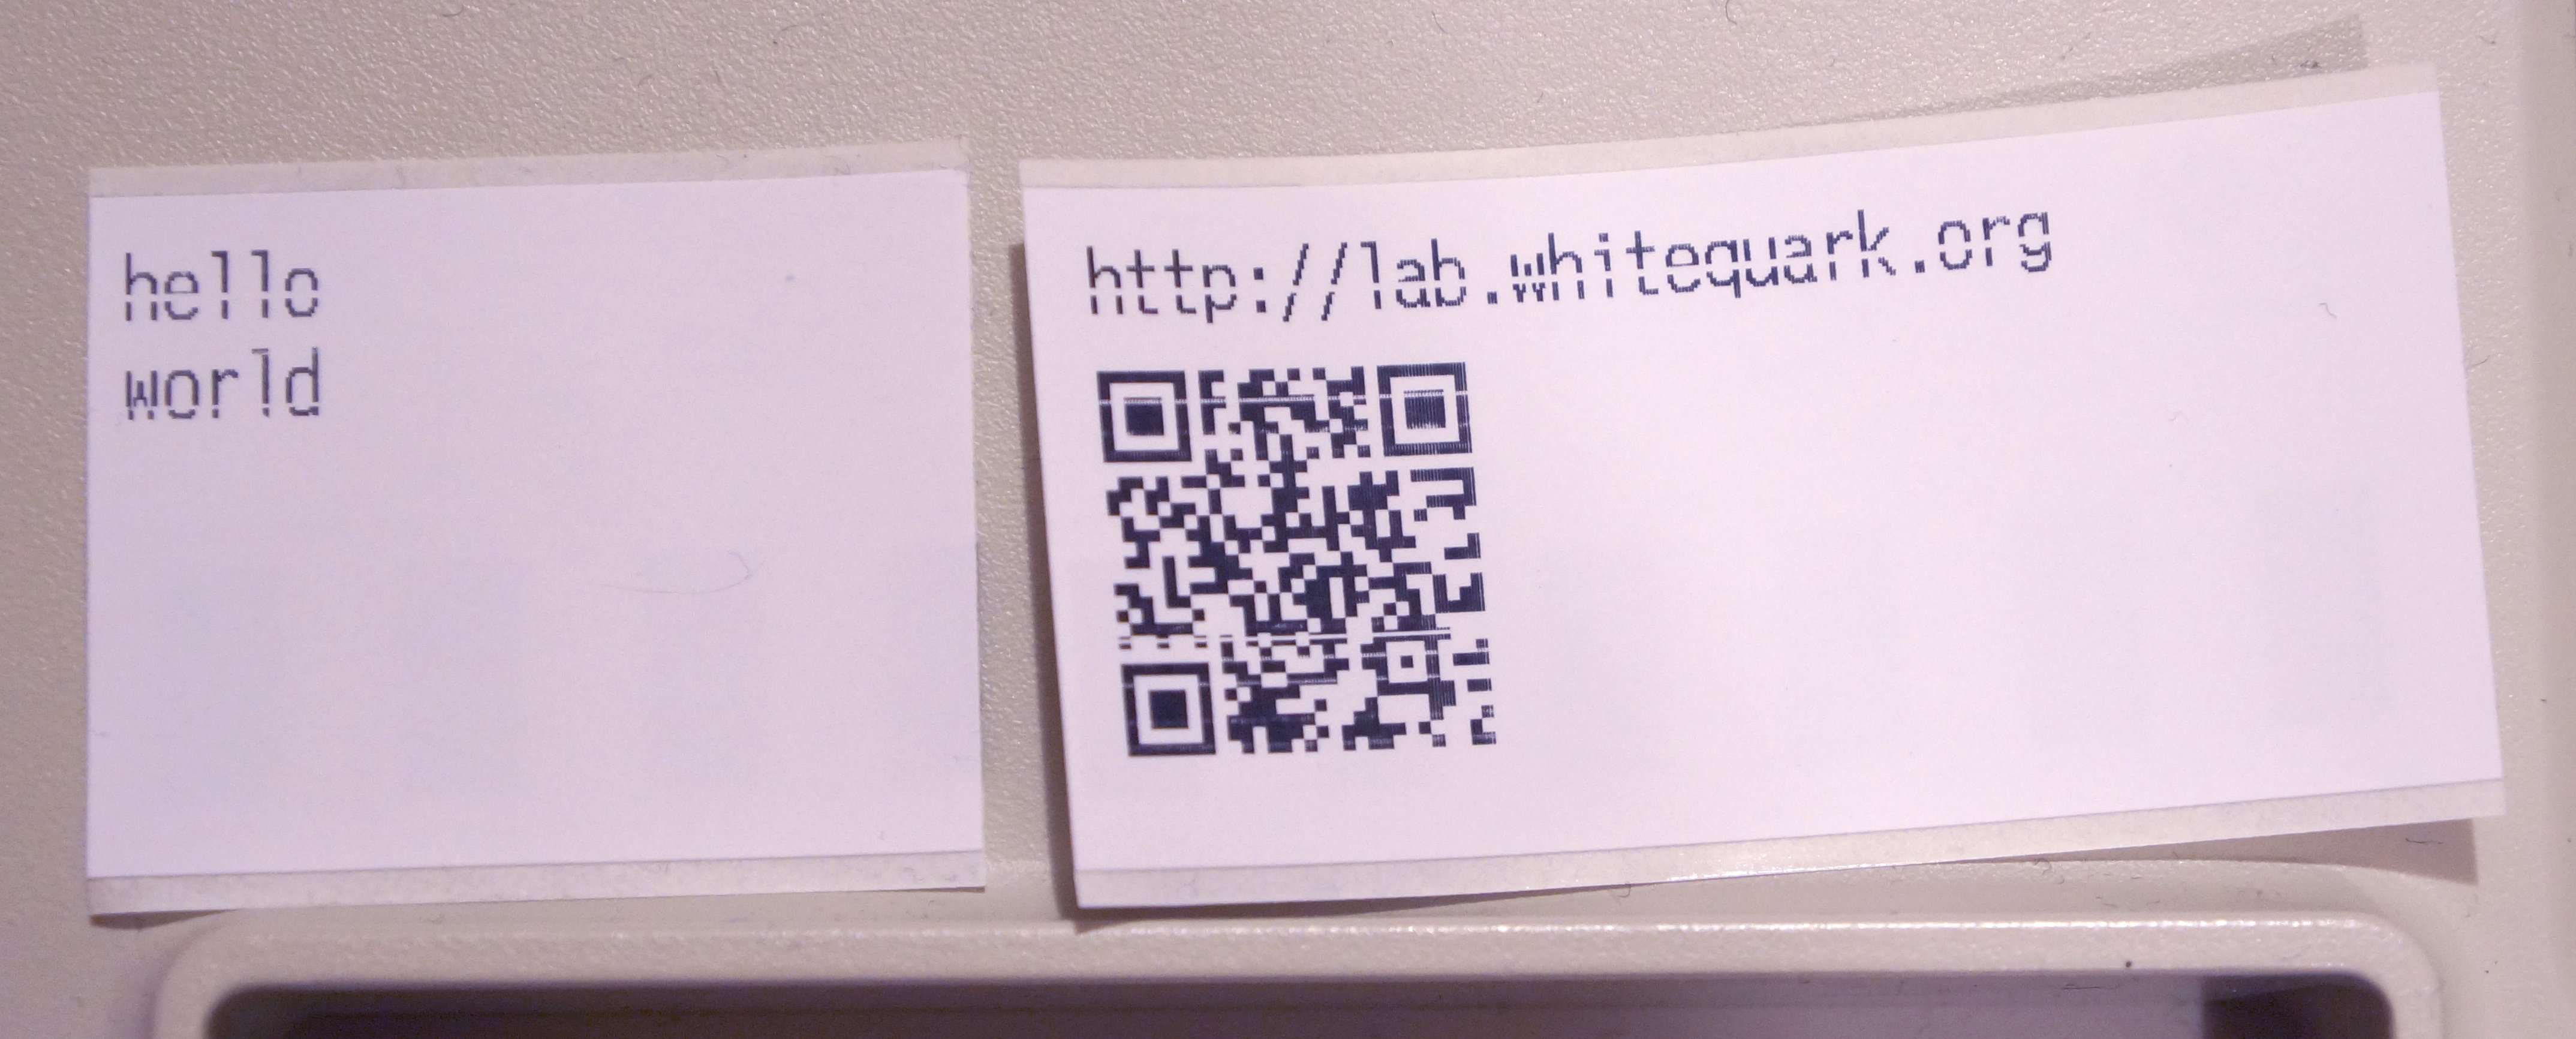
hello\nworld: schedule text for printing -
FF: print page and return to standard mode -
GS V A \x00: feed paper to cutting position and cut
As a more advanced example, the following script will print a QR code and its textual representation for given text:
1
2
3
4
5
6
7
8
9
10
11
12
13
14
15
16
17
18
19
20
21
22
23
24
25
26
27
28
29
30
31
32
33
34
35
36
37
38
39
40
41
42
43
44
45
46
47
48
49
50
51

#!/usr/bin/env ruby

if ARGV.count != 2
  puts "Usage: #{$0} [IP address of TM-T88IV+UB-E03 printer] [text]"
  puts "  Prints specified text and its QR code representation"
  puts "  on a 29mm continuous label tape"
  exit 1
end

ip, text = *ARGV

require 'socket'
sock = TCPSocket.new(ip, 9100)

# Reset the printer and put it into bottom to top page mode
def page_mode(x, y, w, h)
  "\e@\eL\eT1\eW#{[x, y, w, h].pack("ssss")}"
end

# Change the relative vertical position in page coordinates
def offset_y(d)
  "\x1D\\#{[d].pack("s")}"
end

# Return the GS ( k packet for function number and data
def func1xx(fn, data)
  "\x1D(k#{[2 + data.length].pack("s")}\x31#{fn.chr}#{data}"
end

# Print QR code. redundancy_level should be ?0..?3.
def qr_code(text, pixel_size:, redundancy_level: ?0)
  func1xx(67, [pixel_size].pack("C")) +
    func1xx(69, redundancy_level) +
    func1xx(80, "0" + text) + # set text
    func1xx(81, "0") # actually print
end

# Print page, feed to cutter and cut
def cut_page()
  "\x0c\x1DVA\0"
end

height = text.length * 25
height = 300 if height < 300
sock.write(
  page_mode(0, 0, ((29.0 / 80.0) * 512).to_i, height) +
  offset_y(16) +
  "#{text}\n" +
  offset_y(-12) +
  qr_code(text, pixel_size: 4, redundancy_level: '2') +
  cut_page())
Observations and conclusions
The dead space due to the distance between the cutter and the print head is quite noticeable on narrow 29mm label paper.
The Brother DK22210 paper roll is slightly over 80mm in diameter and the spacer diameter could be made higher (e.g. 90mm) to make manual rewinding of tape easier as well as improve alignment at the very beginning of a roll.
In case label gap detection is desired, bit 2 of response to DLE EOT 1
tracks the state of drawer open/close switch. The drawer connector is
laid out as follows:
| Pin # | Function |
|---|---|
| 1 | Frame ground |
| 2 | Drawer kick-out drive signal 1 |
| 3 | Drawer open/close signal |
| 4 | +24V |
| 5 | Drawer kick-out drive signal 2 |
| 6 | Signal ground |
Overall, Epson TM-T88 series receipt printers make decent label printers that even allow for variable label size.