Continuous condensate drainage from an off-the-shelf dehumidifier
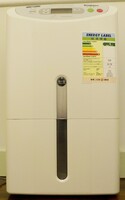
Tags:Recently I moved to Hong Kong. Hong Kong is great! The near-constant 95% humidity levels, though, are not; I tolerate them very poorly. I bought a Hitachi RD-210EX dehumidifier, which works great, but its reservoir has about 4.5 L of effective capacity whereas the amount of moisture removed from a tiny 10 m² room in 24 hours can approach 10 L during rain. It quickly became annoying to empty the reservoir manually, more so when the full switch trips while I sleep. Clearly, some automation is needed.
Tools
- Wire stripper
- generic
- Terminal crimper
- generic
- 3.5mm Torx head screwdriver
- generic
Materials
- Drainage pump
- Aspen Mini Orange
- 1/4” PVC tube
- generic
- 6.35mm crimp tab terminal ×4
- generic
- 6.35mm crimp receptacle ×4
- generic
- 6.35mm crimp piggyback terminal ×1
- generic
Internals
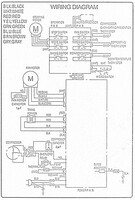
First, let’s take a look inside the dehumidifier, because it’s a very neat little device. It even has schematics on the back panel!
It’s somewhat annoying to disassemble because half of the screws are Philips head and half of them are Torx head, and you need to remove both; moreover, before the back cover can be removed or replaced, the front cover (the one with the sticker) has to be removed. It is held in place by three latches at the bottom, which I actually don’t know how to access even after I’ve seen it disassembled, so what I did is used the flexibility of plastic to force the top of the cover off the base structure. This stresses it a lot and can probably be done at most once without fracturing the plastic.
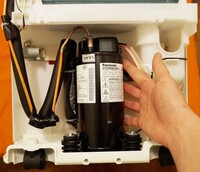
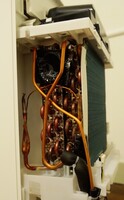
Look at this adorable little vertical R134a compressor, with what I think is 1/8” liquid and 3/16” gas lines:
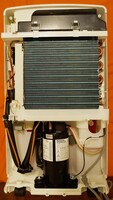
Incidentally, it’s very easy to see all the important parts. From left to right, it’s the fan, pulling air through the heat exchangers and ejecting it upwards, condenser, where hot liquid freon exiting the compressor cools down, and evaporator, where cold liquid freon boils, condensing moisture on radiator fins. The thin coiled capillary is a metering device (also known as throttling device), the goal of which is to lower the pressure in the evaporator below the boiling point of the freon.
The liquid line is wrapped in insulating putty in several places where it contacts the plastic, lest it would melt it; freon at the compressor outlet can be as hot as 80°C during normal operation. The gas line returning to the compressor is wrapped in insulating foam to prevent water condensing around it.
A vertical compressor is chosen instead of a horizontal one used in most fridges because it is much quieter due to its symmetric mode of operation.
Modification
WARNING: THE MODIFICATIONS DESCRIBED HERE RESULT IN MAINS VOLTAGE ACCESSIBLE AT THE PUMP CONNECTOR WHEN IT IS UNPLUGGED. DO NOT DO THIS WHEN CHILDREN CAN ACCESS IT. DO NOT DO THIS AT ALL IF OUTLETS ARE NOT PROTECTED WITH AN RCD/GFCI. (What the hell is wrong with your home if it doesn’t have a Class A RCD installed?) Note that the connector is latched and won’t fall out on its own; it could be glued in to make sure it stays in its place.
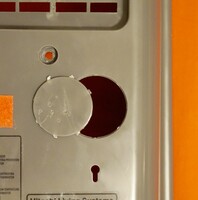
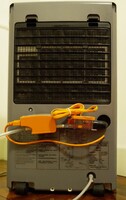
Let’s take a closer look at the dehumidifier. What’s this at the back? A breakaway piece of plastic hiding a standard drainage outlet! There’s also some weird mounting hole; not only it’s completely unreinforced in a large weak sheet of polypropylene, but also the only hole of that shape, so I have no idea what it’s supposed to be used for. I’m going to use it to bring out a cord for the pump.
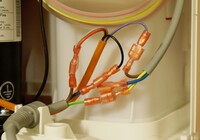
Now, rewiring! The pump is powered via red and black wires, and contains a normally closed switch across grey and violet wires that opens when the pump is unable to evacuate water quickly enough for whatever reason. Not flooding your room and/or the guts of dehumidifier in case of a failure sounds like a great idea, so I connected the switch in a break of the live wire of the dehumidifier:
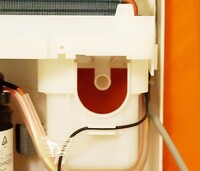
As for mounting the pump, it’s a simple job of combining the included 16mm drainage tube, an elbow, a float box and the pump, and attaching it with the self-adhesive hook and loop fastener… all of which is conveniently included with the pump. Aspen’s motto is “by engineers, for engineers” and I cannot praise it enough, because they thought of everything—there’s even an anti-siphoning device included. It’s a bit on the expensive side (around 65 USD), and it’s worth every cent.
Also, everything about it is orange. How can you not like that?!
Here’s the result:
The pump is very loud when it’s pumping air, but quiet when there’s water in it. If the fan is on the “high” setting, the pump is barely heard.
